Related Items



Make Your Own Snow Globe!
For Ages 3+
It takes just 15-20 minutes
Bring a little winter magic indoors with this easy homemade snow globe. Kids can choose their own tiny winter scene, add a sprinkle of glitter and watch the snow swirl around!
You will need
Let’s make it!
Step 1: Create your winter scene
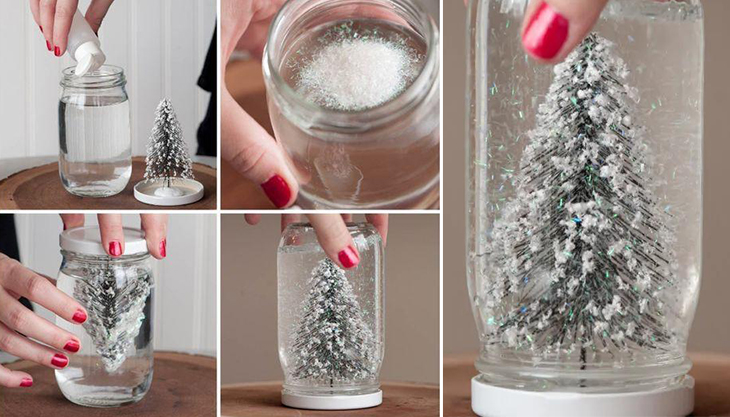
Choose a little toy, animal or Christmas tree. An adult can help glue it securely to the inside of the jar lid. Leave it to dry.
Step 2: Add the sparkle
Sprinkle a pinch of glitter into your clean jar. White, silver or blue glitter all look lovely.
Step 3: Fill with water
Carefully fill the jar almost to the top with water, leaving a little room for the decoration.
Step 4: Put it together
Once the glue is completely dry, carefully screw the lid on tightly. An adult should seal around the lid if needed to prevent leaks.
Step 5: Let it snow!
Turn your snow globe upside down, give it a gentle shake and watch the glitter float down like falling snow!
Other ideas to consider…
Hope you and your little ones have lots of fun!